My opening words of comfort to you: I am not great at many things. So if I can do it, YOU can certainly do it. This is my clueless girls guide to creating a stuffed animal out of a sock.
I'm not gonna lie, this is fairly simple. Let me say that I barely know how to use a sewing machine, can rarely follow directions properly and usually get frustrated with any new project that I try less than halfway into it. Which leaves me with a bunch of funky looking half finished projects all over the house. Despite my lack of expertise with a sewing machine, I still very much enjoy actually sitting down and sewing. One day I will attempt to make an article of clothing using an actual pattern. But today is not that day. For my first project however, I have attempted to follow directions that I saw in a magazine to make a doll out of a sock. Similar to a sock monkey, only not like a sock monkey at all. Confused yet? Good, we're all on the same page.
The best part about this project is that I spent exactly 3 dollars. And I only spent that much because I wanted some variety. I was lucky enough to have some poly fiber filling at my house, thread, needles, a glue gun and other various crafting items. If you don't have any stuffing then it will cost you more. I picked up three pairs of socks from the dollar store. I figured if I totally screw this up, at least I only spent three bucks. So let's boogie already.
Take one sock at a time and lay it on a flat surface. Cut off the length that would go up your leg.
Make another cut right after the heel.
Now take the part left over that goes over your foot and toes and cut it in half. This will make the arms of your creature. The long part of the sock that goes up your leg will make the head, body and legs.
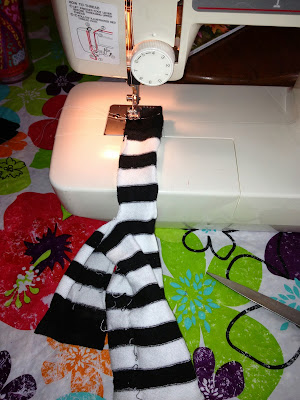
With the foot section cut in half, take each half (wrong side out) and sew the sides closed, leaving an opening at the top. Flip the arm right side out, fill with stuffing and then hand stitch the rest of it closed and set aside. To make it nice and neat, tuck in the ends and stitch them inside where they wont be seen. Repeat on other arm. (Do people call it stuffing? I call it stuffing.)
Go to the bottom half of the long part of the sock, find the middle and cut up as far as you wish to go to make the legs as long as you want. If you wish for your creature to have horns, find the middle of the top of the sock and cut down a few inches. Depending on how long you want your horns to be. If you don't want horns/ears then just leave this part alone.
 |
| Option 1: Flat Head |
 |
| Option 2: With Horns/Ears/Pop Up Eyes |
Once your creature is right side out and stuffed, hand stitch the leg closed. Since it alternated between black and white I just went for white all the way. It's on the inside of the leg, so it's not very noticeable anyway.
Taa-daa! My finished body.
If you opted for a tail, follow the same rules as before. Sew it (wrong side out) into a rectangle, leave about an inch opening, flip it, stuff it, stitch it shut. Set aside.
All my individual parts made. This didn't take long at all. The most difficult part was the few hundred misunderstandings that the sewing machine and I had over how a bobbin is supposed to function properly. I'm not gonna lie, I had to call my mommy in to set it straight for me. That's how I fight my battles. "MAAA!"
Once you're ready to attach your arms (and optional tail) just hand stitch them onto the desired location. From here on out it's up to you how you want to finish your creature. I loved this striped guy, but I wanted to mix things up. I repeated the above steps on two other pairs of colored socks and started trading body parts and adding embellishments. You can use poms poms, googley eyes, hot glue, sequins, buttons, yarn, felt, jingle bells, old jewelry...the list goes on and on. I kept it cheap this time, just using what I had around the house. I am very fond of Kawaii style, so I chose that for all my creature faces. Here are the finished bodies, without faces...
 |
| Sorry about the pink on pink. Makes it difficult to see, but everyone was on my bed. |
And here is everyone completely finished.
I am happy to report that when my 6 year old got home from school she squealed with delight over these creatures. She begged me not to sell them all, and chose for herself the 2nd one pictured. The next morning when her friend came over to get a ride to school, she also chose one for herself. LOL! She picked the one with the two hearts above the eyes. Well at least I know the target audience (we'll call them the focus group) approves! Mission accomplished! This feels so GREAT!
 |
| My sewing set up. |


No comments:
Post a Comment