Thursday, September 19, 2013

Adventure in Crafting: A DIY Sock Creature (Level: Super Easy)

My opening words of comfort to you: I am not great at many things. So if I can do it, YOU can certainly do it. This is my clueless girls guide to creating a stuffed animal out of a sock.

I'm not gonna lie, this is fairly simple. Let me say that I barely know how to use a sewing machine, can rarely follow directions properly and usually get frustrated with any new project that I try less than halfway into it. Which leaves me with a bunch of funky looking half finished projects all over the house. Despite my lack of expertise with a sewing machine, I still very much enjoy actually sitting down and sewing. One day I will attempt to make an article of clothing using an actual pattern. But today is not that day. For my first project however, I have attempted to follow directions that I saw in a magazine to make a doll out of a sock. Similar to a sock monkey, only not like a sock monkey at all. Confused yet? Good, we're all on the same page.

The best part about this project is that I spent exactly 3 dollars. And I only spent that much because I wanted some variety. I was lucky enough to have some poly fiber filling at my house, thread, needles, a glue gun and other various crafting items. If you don't have any stuffing then it will cost you more. I picked up three pairs of socks from the dollar store. I figured if I totally screw this up, at least I only spent three bucks. So let's boogie already.

Take one sock at a time and lay it on a flat surface. Cut off the length that would go up your leg.


Make another cut right after the heel.


You can also make one additional cut if you wish to add a tail to your creature. I forgot to take a picture of this step, so I just drew a circle around where you would make this cut. You would want it to be about 1 1/2 inches thick.


Now take the part left over that goes over your foot and toes and cut it in half. This will make the arms of your creature. The long part of the sock that goes up your leg will make the head, body and legs.


With the foot section cut in half, take each half (wrong side out) and sew the sides closed, leaving an opening at the top. Flip the arm right side out, fill with stuffing and then hand stitch the rest of it closed and set aside. To make it nice and neat, tuck in the ends and stitch them inside where they wont be seen. Repeat on other arm. (Do people call it stuffing? I call it stuffing.)


Go to the bottom half of the long part of the sock, find the middle and cut up as far as you wish to go to make the legs as long as you want. If you wish for your creature to have horns, find the middle of the top of the sock and cut down a few inches. Depending on how long you want your horns to be. If you don't want horns/ears then just leave this part alone.

Option 1: Flat Head

Option 2: With Horns/Ears/Pop Up Eyes
 Once you have made all your cuts, flip everything inside out. With the wrong side out, sew ends and inner edges and ears/horns/eyes (if you opted for those) shut. Leave an opening in one leg big enough for you to work with so that you can flip your creature right side out and then easily fit stuffing everywhere it needs to go.


Once your creature is right side out and stuffed, hand stitch the leg closed. Since it alternated between black and white I just went for white all the way. It's on the inside of the leg, so it's not very noticeable anyway.


Taa-daa! My finished body.

If you opted for a tail, follow the same rules as before. Sew it (wrong side out) into a rectangle, leave about an inch opening, flip it, stuff it, stitch it shut. Set aside.


All my individual parts made. This didn't take long at all. The most difficult part was the few hundred misunderstandings that the sewing machine and I had over how a bobbin is supposed to function properly. I'm not gonna lie, I had to call my mommy in to set it straight for me. That's how I fight my battles. "MAAA!"


Once you're ready to attach your arms (and optional tail) just hand stitch them onto the desired location. From here on out it's up to you how you want to finish your creature. I loved this striped guy, but I wanted to mix things up. I repeated the above steps on two other pairs of colored socks and started trading body parts and adding embellishments. You can use poms poms, googley eyes, hot glue, sequins, buttons, yarn, felt, jingle bells, old jewelry...the list goes on and on. I kept it cheap this time, just using what I had around the house. I am very fond of Kawaii style, so I chose that for all my creature faces. Here are the finished bodies, without faces...

Sorry about the pink on pink. Makes it difficult to see, but everyone was on my bed. 

And here is everyone completely finished.


I am happy to report that when my 6 year old got home from school she squealed with delight over these creatures. She begged me not to sell them all, and chose for herself the 2nd one pictured. The next morning when her friend came over to get a ride to school, she also chose one for herself. LOL! She picked the one with the two hearts above the eyes. Well at least I know the target audience (we'll call them the focus group) approves! Mission accomplished! This feels so GREAT!

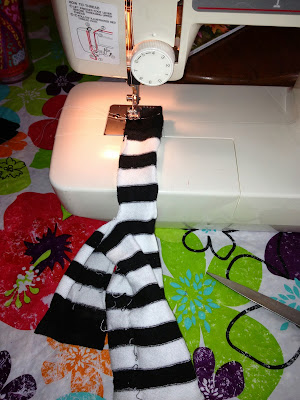
My sewing set up. 

Friday, August 30, 2013

The Unsung Generosity of Lisa Frank

Did I ever tell you my Lisa Frank story? It really is quite charming. This memory is about 25 years old so details like dates and exact contents may vary slightly. But it is true, and it did happen.

For those of you who don't know, Lisa Frank is a person, an artist and a company. She founded Lisa Frank Incorporated at the age of 24. She is known for her use of bright colors and cute, glossy eyed animals on stationary and school supplies. Designer Jeremy Scott's Fall 2012 show even featured a corset covered completely in Lisa Frank stickers.

Found this pic of the corset on the Squaresville blog. Link attached to pic.

When I was a young girl in the 1980's, Lisa Frank items were among my most coveted. I always have had a thing for stationary items and I thought her designs and colors were nothing short of magical. They were practically tailor made for me. Today I am 34 years old and I have still not outgrown rainbows and lollipops. But anyone who has grown up in a military household can vouch for the fact that there is not always extra money for things like colored stationary and erasers with unicorns on them. Although the belt was tight most times, we had the things we needed. Food and the like. But like I tell my daughter today when there are similar tight belted times, there is a difference between things we desire, and things we require. Money set aside for desirables, my daughter and I call "foolish money". I use that phrase so that I don't deny her request for some desired object by saying "I don't have any money", because those words can terrify a child like mine who tends to worry. If I say "We don't have any foolish money right now", she knows that the food and house and gas money are still there and she has nothing to worry about. She just can't attain her desirable right this minute.

So going back to nineteen eighty-something, I would always stare at the various multicolored, animal adorned items but have to walk away empty handed because my allowance just wasn't enough to cover it. So one day while I was holding a package of stickers or pencils and turning it around in my hand just to admire it all, I noticed an address on the back that you could write to if you had questions or concerns. Well I had a question. How come this stuff meant for little girls was too much for little girls like me to buy? I asked my mother to please write down the address for me, and as soon as I got home I broke out the (non-decorated) paper and pencil and wrote Ms Frank a heartfelt letter. I remember saying:

                               Dear Lisa Frank, 
                               I really love all your stuff but I can't get any of it 
                               because I don't have enough allowance. Can you 
                               please lower your prices so I can buy some?

                                                                                      Love, Brandy

I asked my mother to mail it, and waited to see if my request would be heard. I checked the prices in the store a time or two to see if my letter writing had made a change. But without the internet, without knowledge of how the world works outside of "the best things come to those who wait" (thanks to the ketchup commercial), that was all I could think to do.

I don't remember how much time passed, but maybe a few weeks later (said with uncertainty) a package arrived that was addressed to me! What? You can imagine the excitement and wonder I felt. It wasn't my birthday. It wasn't Christmas. Who would send me something? In a big box! What could it be? OHMYGAWDWHATISIT?! As the scissors finally cut the tape on the box open and I got a peak inside, you could almost hear the fairy dust in the air. My eyes got big, my mouth fell open, I sucked the air out of the room. I was so confused and shocked and...just...*cue freak out*. It was a box filled with Lisa Frank goodies sent from Lisa Frank itself! My first ever Swag Bag. And I swear to you, any swag bag I could ever receive in the future will never hold such magic and wonder and mean so much to me as this box from Lisa Frank did. Paper and stickers and pencils and folders, probably a Trapper Keeper in there. I was too busy having my first orgasm to remember if there was a letter accompanying all the plunder. But if there was, I now desperately wish that I had kept it. This was also before my family became a people of shutterbugs, so I don't believe that we even have a picture of it. But trust me when I say, and my family backs up this story, that this absolutely did happen. Some WONDERFUL person at Lisa Frank took pity on a girl with a small allowance, a dream and a taste for brilliantly colored school supplies festooned with adorable animals, sparkles and rainbows, and sent her a veritable smorgasbord of dreams come true.

I wonder how many other children they did this for. I wonder if those kids remember it like I do. This event was such a landmark occasion in my childhood. It totally backed up my already present belief that dreams come true, good people and generosity exists, magic is in the hearts of people everywhere and if you believe it, you can achieve it. What a wonderful person this was that sent me so much more than just stickers and paper. They sent me a lifetime of fairy dust, magic, hope and the desire to give people the same feeling that I felt that day. To this day, my room is decorated with brightly colored objects of all sorts. Lisa Frank isn't just for little girls. It's for the little girl in all of us.

Let this be a lesson to those reading. Little things you do can influence and inspire someone else their whole life long. Let your words be kind and uplifting, let your actions be selfless and generous, let your mind be kind and your heart filled with love. Let your inner child live on and overrule your bad habits of letting cynicism enter your mind. Be bright. Be a beacon. You can touch one person and change a lifetime. All this from a box of stickers, you say? Yes. All this from a box of stickers. No kind gesture is too small to give hope to someone who is willing to receive it. And to whoever it was that sent me that box of childhood fantasy, thank you. Thank you from the bottom of my heart. Your thoughtfulness has never been forgotten.

Back in my letter writing days. Campaigning for fair pricing for kids.

Still today, Lisa Frank continues to inspire young girls. Just a few minutes of clicking around on her website showed me things like an easy to follow "how to" feature called A Girl's Guide to Following Her Dreams, an empowering and informative article called Sunshine for your Self Image, and something that you've seen me write on often, at home DIY beauty treatments for young girls called Beauty By Nature. How fun is that? Lisa Frank, you go girl!

Another example of support and encouragement to be found on the Lisa Frank website.


Thursday, August 22, 2013

Get Ready With Me: Date Night Facial Routine

As I have stated before, I don't date much. (see blog) (also see this blog)
That being said, when I do date, I take it pretty seriously. Especially the all important "First Date". I take pride in putting my best foot forward. I think to properly cleanse and ready yourself, including your face, your clothes, your hair, your scent, your breath, all shows that you respect the person you are meeting and respect the date itself. It shows that you are all in, even if you only make it through that one date. If it all falls apart, at least you can take pride in knowing that you showed your date the respect that you would hope to receive from them. I didn't mention behavior, because if you haven't gotten that under control by your mid-thirties, I don't know how this blog about a facial can help you.

Anyway, it's something I like to do. I enjoy being a girly girl, even if I don't get to relish in all the wonderful and fun things that that can entail as often as I would like. So, inspired by an adorable video tutorial I saw on YouTube entitled "Get Ready With Me! <3 My Bedtime Routine" by missglamorazzi, I decided to let you all watch my upbeat optimism give me an excuse to play with my face for a few extra minutes.

I started out by exfoliating and cleansing my face with some softened and crushed aspirin, ala the honey and aspirin facial. Only this time I didn't use honey. I just didn't want to add any more residue to be washed off today. All I did was take a few uncoated aspirin and add a few drops of water. Then you crush them up with a spoon.

Just the aspirin. It stayed on pretty well.

For those who don't know, aspirin contains salicylic asid, which is a main ingredient in acne treatments. Aspirin is also a nonsteroidal anti-inflammatory drug. And you can get some uncoated aspirin for about $0.88 a bottle at your local Walmart.

I left that on my face for about twenty minutes or so while I completed the next step, which was a coconut oil treatment on my hair. I had never done this one before, but I have read a lot of wonderful things about coconut oil. Apparently it's a multitasking miracle worker. You can cook with it, moisturize your skin and hair with it, remove eye makeup with it and do about a thousand other things. All of which I plan on trying out. Eventually.  


I got this jar of Spectrum Organic Coconut Oil at Walmart for about $10
When I first bought this jar, the oil inside was a coagulated solid. I guess you are supposed to scoop some out and heat it up. BUT, Texas weather in the summer being what it is, even inside the air-conditioned house, when I went into the cupboard to fetch it, it had already liquefied all by its widdle self. So I wrapped a towel around my neck and just started pouring the oil into my hair a section at a time. I worked it through to the tips of my hair, really saturating everything, and then twisted my hair into a makeshift bun. Then I placed a bag over my head to let it simmer a while.

As slick as a used car salesman.

So then I grab a fresh new razor and hop in the shower. 

Those of you who know me on Facebook know that I have recently become obsessed with obtaining a Clarisonic Mia 2.
How CUTE is this Peony color??
Everyone I talk to swears by them and does nothing but sing praises of it's cleansing power and ability to ward off wrinkles and such. But at $150, it's going to be a good long while before I snag one of these little beauties. Some of you may say, "$150! That's preposterous!" To that I say, maybe. But as one very wise hairdresser once said to me "People will spend $200 on an outfit or a pair of shoes, wear it once, and then retire it to the closet forever but skimp on hair and face care. You wear your face everyday! And it's the only one you get. Spend your money wisely." Wiser words had never been spoken to me. I am guilty of skimping on my hair, especially lately, with disastrous results. (Check back later for a blog on how I accidentally ombre'd my hair. *eye roll* That little mishap has left my hair uncharacteristically dry and yuck feeling. My hair is normally smooth and soft, so this depleted, juiceless hair is really pissing me off.)

But until I've got an extra $150 hanging out in my pocket, I picked up the "poor man's Clarisonic" from the dollar store. It's just a little non-fancy face brush. But it's gonna have to get the job done for now. I used it along with some Olay Foaming Face Wash. 
Olay Face Wash about $5 from Walmart
"Klarisonik" face brush - $0.99 from the $0.99 store.

As you can see, it doesn't really foam. Even when I don't use the brush.
I wouldn't really recommend this. I'll be moving on a different product once I finish this off.

Washed my face. Washed my hair. Shaved my legs. Got out. Wrapped my hair in a soft t-shirt, which I have heard is much better for your hair than wrapping it in a towel. Unless you have a microfiber towel. Then that's cool too.


Once out of the shower I used some toner on my face and neck. The exact difference between toner and astringent continues to baffle me. But from my reading, I see that adding toner after washing your face can help to remove any excess face wash and balance out your skin and close your pores and yadda yadda yadda. Whatever it does, everyone says that you need some. 

The next step was to steam my pores with some chamomile tea infused water. Chamomile tea, like the almighty coconut oil, has many health benefits. Some of which are reducing swelling and fighting bacteria. 

Camped out over a boiling pot of tea.
Right about now I wanted to die. I was already hot from showering (even after a cold shower, I am hot. Always) and now I've just spent five minutes with my face over a boiling pot of water. I needed to go take a little break and lay out under my ceiling fan. 

post steam cleaning 

Now I apply a clay based mask. I chose Freeman Facial Clay Mask with Avocado and Oatmeal (about $4 at Walmart). Mostly because that was the only mask I could find that had the word "clay" in the title. Clay masks are said to be useful at sucking dirt right out of your face. I've used this a few times now. I can't really tell if it makes any difference, but I like using it. It feels neat and I'm sure it's helping to keep me clean. You apply it and wait a few minutes until it dries up, then rinse off with warm water. 


My face was dried up, it was too hard to smile.
Had a little spot on my chest that I wanted to take care of while I was at it. 

All cleaned up. I've got a few nice blemishes peaking out there.
Thanks guys, I was worried you wouldn't show up for my date. 

Okay, I seem to be having trouble with my photos once they're uploaded. They look like they're a little glossy and photoshopped, but I swear this is not the case. They're doing it by themselves. My honest intention with this is to show you real results, and my photos do not seem to agree with me today. 

Anyway, with my face all spiffed up and ready for a night on the town, I turned my attention to re-polishing my nails. 

I chose Sinful Colors #113 Dream On, which is WAY prettier in real life than I can capture with my camera phone. Highly recommend this color, which I got for $1.98 at Walmart. You can find it here on Amazon, but for five stinking dollars. 


After all of that, I was so into getting ready for this date that I FORGOT to take pictures of my makeup or my outfit. *forehead slap* But at any rate, I am happy to report that the date went well. He was very cute and talkative, but in a good way. He was polite enough to ask me about myself and actually listen when I spoke. Which is a vast improvement over some of my past experiences. Lest we forget this guy

All of this prepping took a while, but I honestly enjoyed it. As I've said before, it's good for us ladies to take care of ourselves. And I really delight in indulging my girly girl side. I swear every time I get ready for a date, I sing at least one of the following songs. 


That's all for now, my gal pals. I leave you with this positive affirmation and wish you a happy day and a life blessed with love. And remember, it's your face. Have fun with it! 


Thursday, July 18, 2013

Adventures in Cooking: The Clueless Cooks Guide to Chicken n' Dumplings

Once upon a time, I was married to a country boy who had a sister who could blow the roof off some chicken and dumplings. I had never had dumplings before. My mother sees them as "globs of snot". (That's a direct quote) I knew nothing about them until I was in my twenties and visiting my sister-in-law in Kentucky for Thanksgiving. During our stay there, she whipped up some chicken and dumplings for dinner. I am a major lover of bread and carbs, so as she was explaining them to me I was already foaming at the mouth waiting to try. OH! Heaven. Heaven on earth that melts in your mouth. Nom nom nom. I couldn't take a bite without closing my eyes and savoring the effect it was having on my mouth. A while later I asked her for the recipe, but she had made them so many times that her response was a little "Oh a pinch of this and a dash of that and I eyeball this..." I was immediately intimidated. Having been told most of my life to "get out of the kitchen" while the cooking was happening, I didn't (who are we kidding? I still don't) have a clue on how to just eyeball something I had never made before and just be expected to know the science of how the ingredients would react with each other.

Fast forward to present day. Now that I live in the south, I love to find occasion to make it to a little establishment called Cracker Barrel. This place is like an extension of your grandmothers southern kitchen. The most fattening and delicious food you've ever tasted. Most of it deep fried and covered with gravy. Well much to my delight, they serve dumplings! But I don't make it to this restaurant enough to satisfy my cravings. Able to deny my taste buds no more, I finally did the only sensible thing I could. I turned to Pinterest to help me find a recipe. Due to the recent foot issues I've been having, it is difficult for me to make it to the store for ingredients. So I just used what I had on hand. You will have to excuse (or just go ahead and laugh at) my lack of knowledge in the kitchen. It really is slim to none.

Here is the recipe I used...

Cracker Barrel Homemade Chicken and Dumplings


I began by boiling some water with chicken bouillon cubes in it. The recipe calls for 2 quarts of chicken broth. So I used 2 quarts of water (8 cups) and 5 cubes of chicken bouillon, even though 4 would have been sufficient. Te extra cube added MUCHO saltiness to the final dish...which was satisfactory to everyone who tried it. I'm sure there is some sort of sodium free version, but that would have been no fun.


So while that was boiling, I gathered my ingredients and threw them in a bowl.


I used a fork and slowly stirred all the ingredients until it formed a ball of dough, just like it said it would in the recipe. Yay!! This whole thing was very easy. I was shocked. I was certain that I would completely destroy it.

Ignore the corn in the background.


The tricky part was getting the dough separated and into the pot. By the end I just gave up with trying to make them look pretty and just chucked them as best as I could.


In a separate pot I had been boiling some chicken still on the bone and with skin. Once it was all cooked I just skinned it, peeled it apart, chopped it up a little and threw it in with the dumplings. Next time I would much rather start out with some boneless, skinless chicken breast. It would go so much quicker.

The dumplings cooking in the chicken broth


Added the chicken. It's still a little soupy here.
 Everything turned out great. I wanted the end results to be really thick, like a gravy. Following the instructions will yield more of a soupy consistency. So I added a little cornstarch. I just followed the instructions on that box and it worked out great.


All thick like gravy. 

Once it thickened up, I served it out. It blew my mind. It was SO GOOD!!! I had two servings, and then went back later for some left overs a few hours later. I am SO happy I finally tried this recipe. If I can do it, I know ANYONE can. So don't be afraid to try.


My mother still hates dumplings...


...but I couldn't get enough.